This article will walk you through running and scheduling reoccurring reports in SAP BusinessObjects. In some cases, SAP BusinessObjects reports take quite some time to process. By scheduling them, you can have the report run during off-hours and delivered to you when you need it. This article assumes you know how to access the SAP BusinessObjects report. If this is not the case, please see this article.
Viewing Reports
From the BusinessObjects LaunchPad will be a button called Folders located at the top of the page.

The left side of the screen will list Personal Folders, My Subscribed Alerts, and Public Folders. Click Public Folders followed by chicago_live-folder.
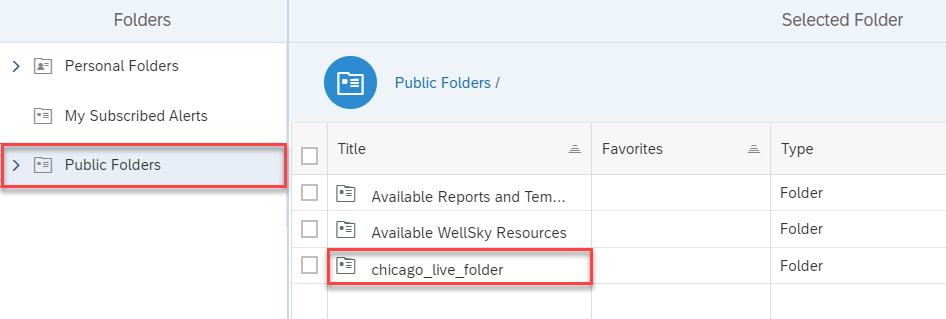
Next, click on Chicago CoC Reports (Secure)
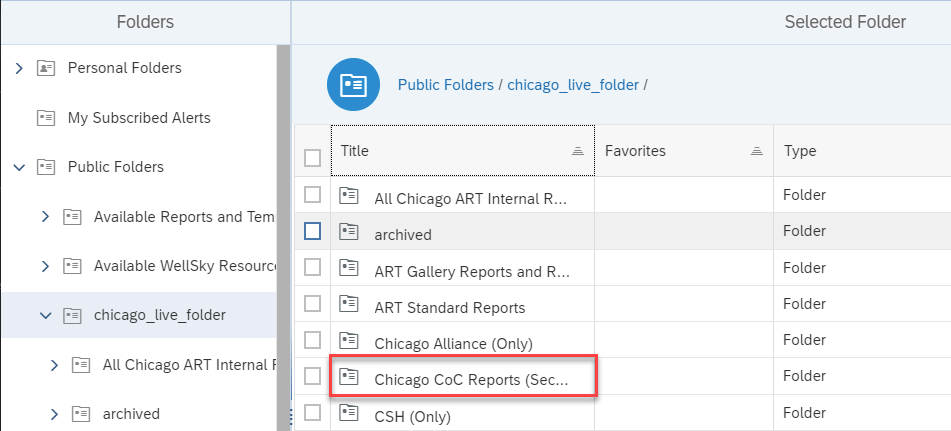
From here will list all available folders containing reports. Clicking on a folder will show the reports located in that folder.
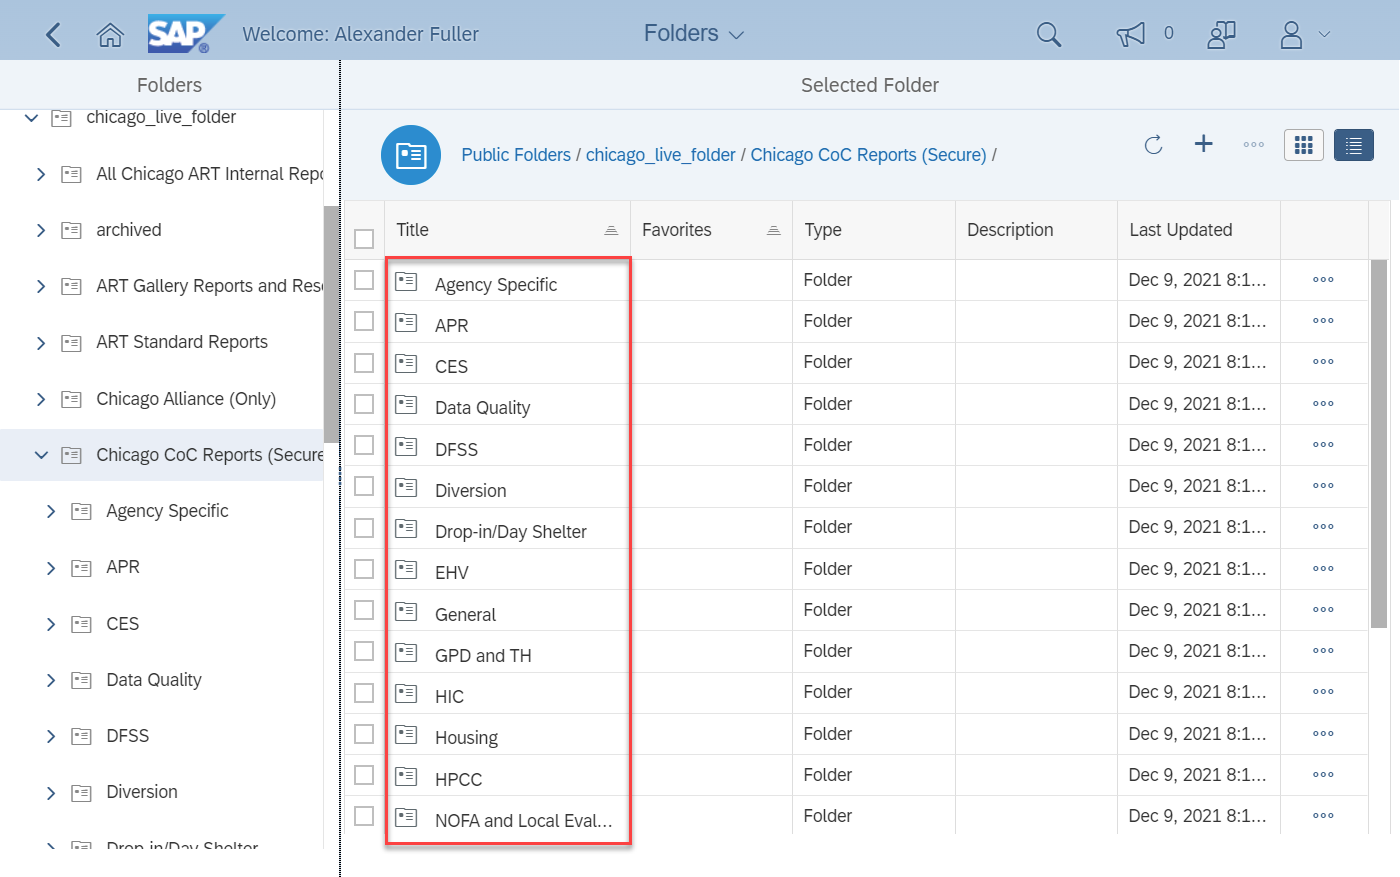
Keep in mind that the folder structure is set exactly how it was in ART. For example, reports previously located in the General Folder are still located in the General Folder in SAP BusinessObjects.
Running Reports
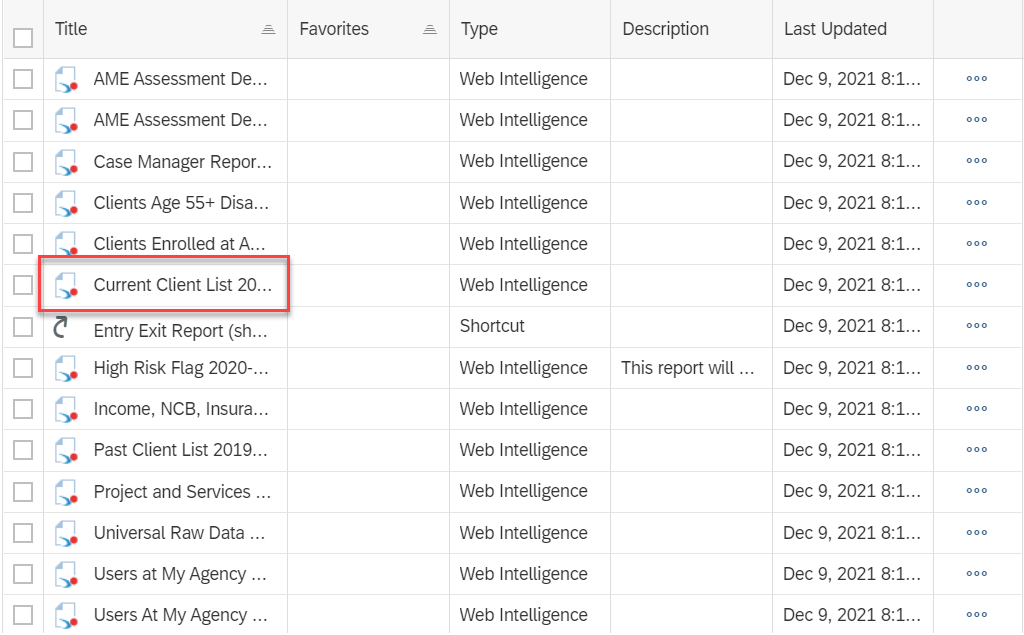
To run any report, click on the report name(ex Current Client List). This will open the report to run.
Once the report loads it will present a prompt so that the parameters of the report can be filled out.
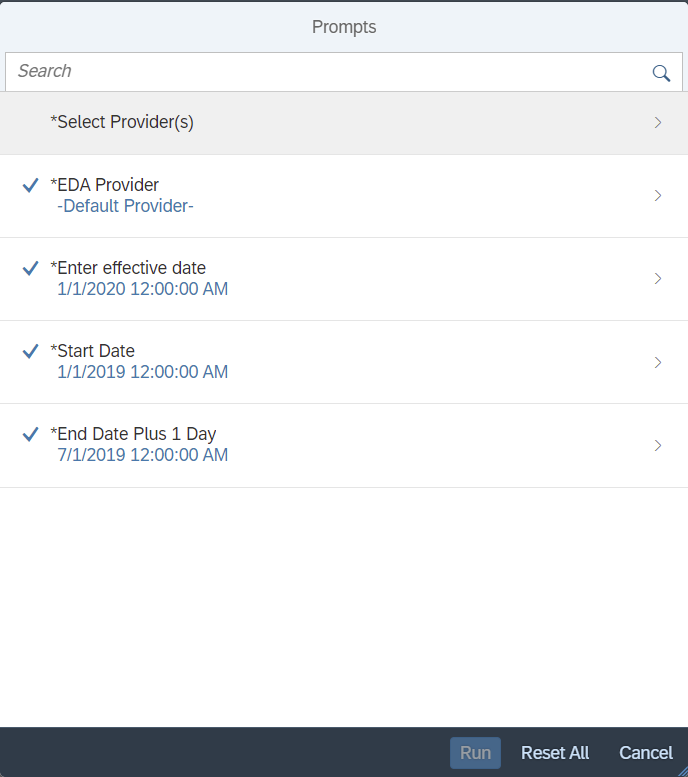
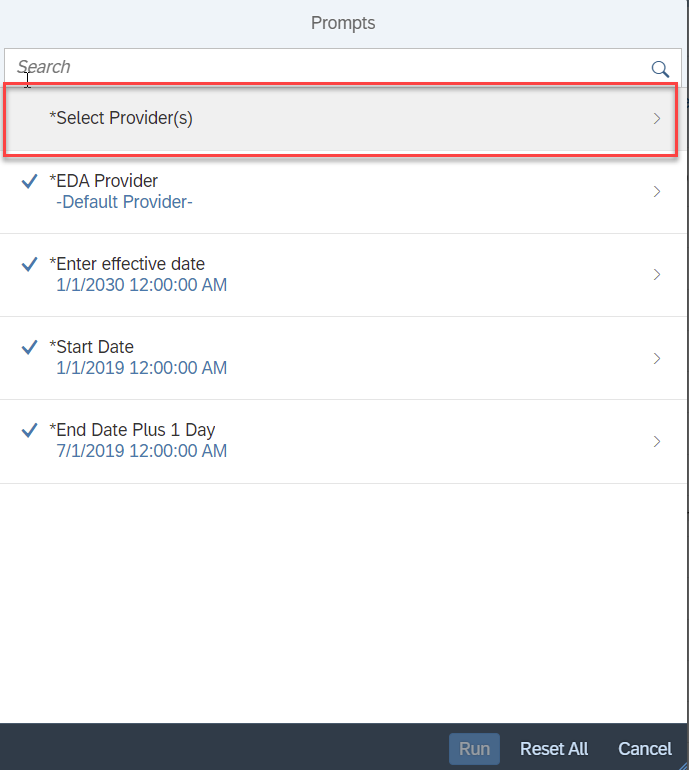
Most reports are set to require at least a Provider and a Date range to be set to generate a report. To do this, if applicable to the report, click on "Provider" and (in some cases "Agency")
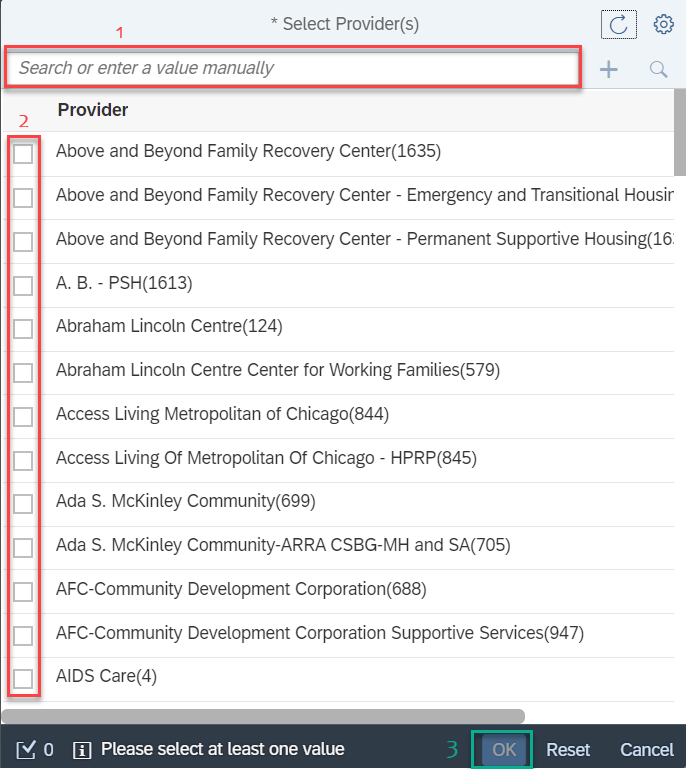
Select the Provider (or Agency depending on the report prompt) from the list populated. To search for a specific project type the project name or ID into the search box above the list. Once selected a check should populate in the box next to the selected project. From there click OK
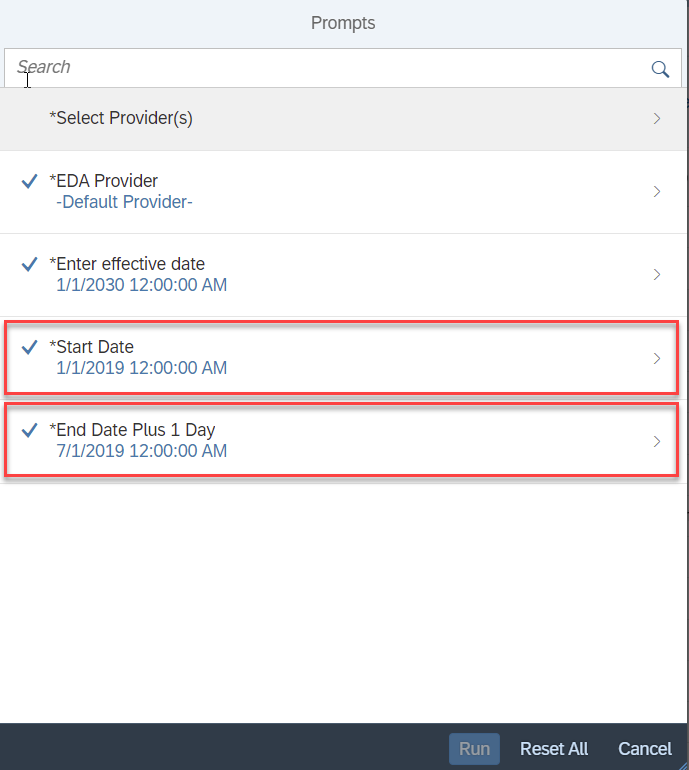
Click on the Start or End Date prompt to adjust the date range for the report.
If there is a Date preset in the report you can remove it by clicking the X next to the incorrect date.
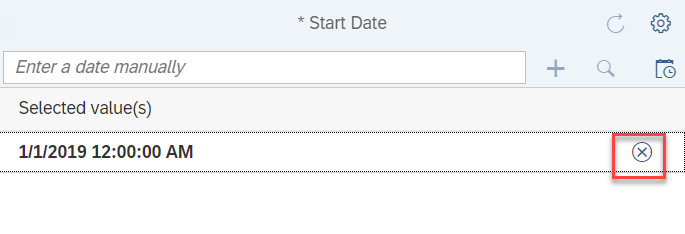
Adding a new date can be done by manually typing in the date or by clicking the calendar at the top right of the pop-up.

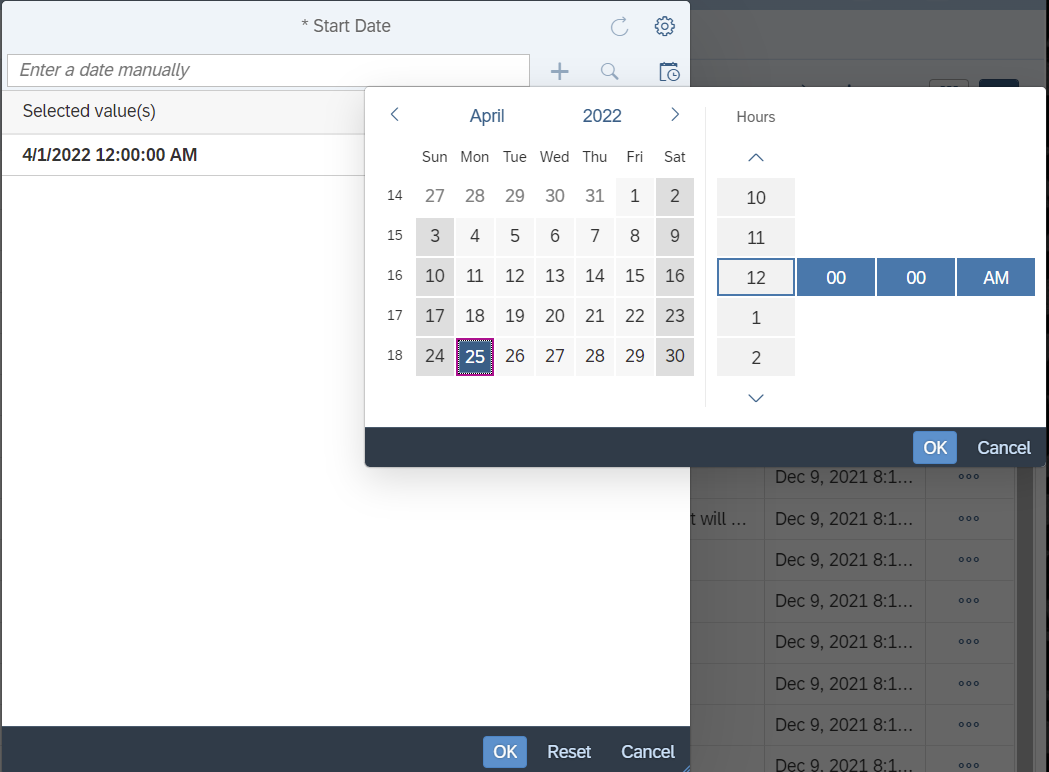
Once the date has been selected, click Ok.
Prompts such as EDA Provider should be left unchanged unless directed otherwise. In most cases Enter Effective Date should be left unchanged unless the date is less than the end date of the reporting range. Ex. Report range 1/1/2022 - 3/1/2022 Effective Date 1/1/2019. In this case, the date would need to be changed to a date after 3/1/2022.

Once all the prompts have been set, click Run at the bottom of the prompt.
Scheduling Reports
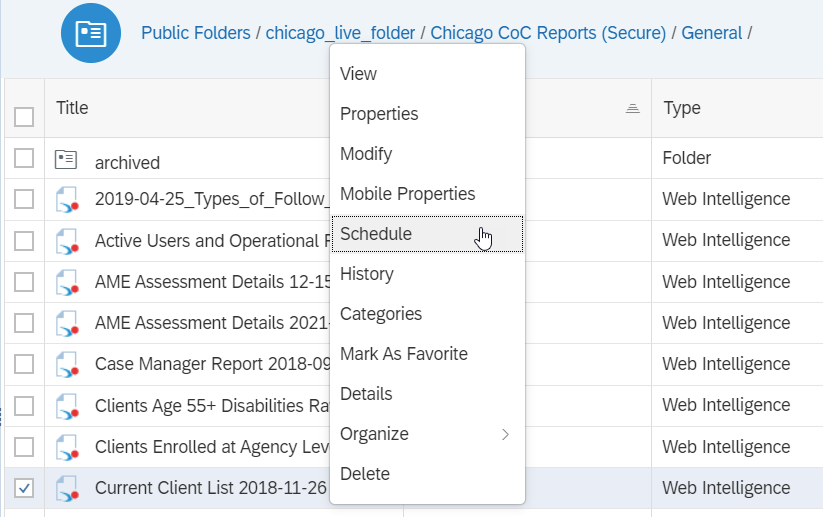
Right, Click on the report to be scheduled. Next, Click Schedule from the drop-down
There will be a pop-up of the report prompt. Complete the appropriate fields in the prompt. Click Run
(For examples of how to complete the prompt, please refer to the Running Reports Section)

Next, the parameters will need to be set for the report
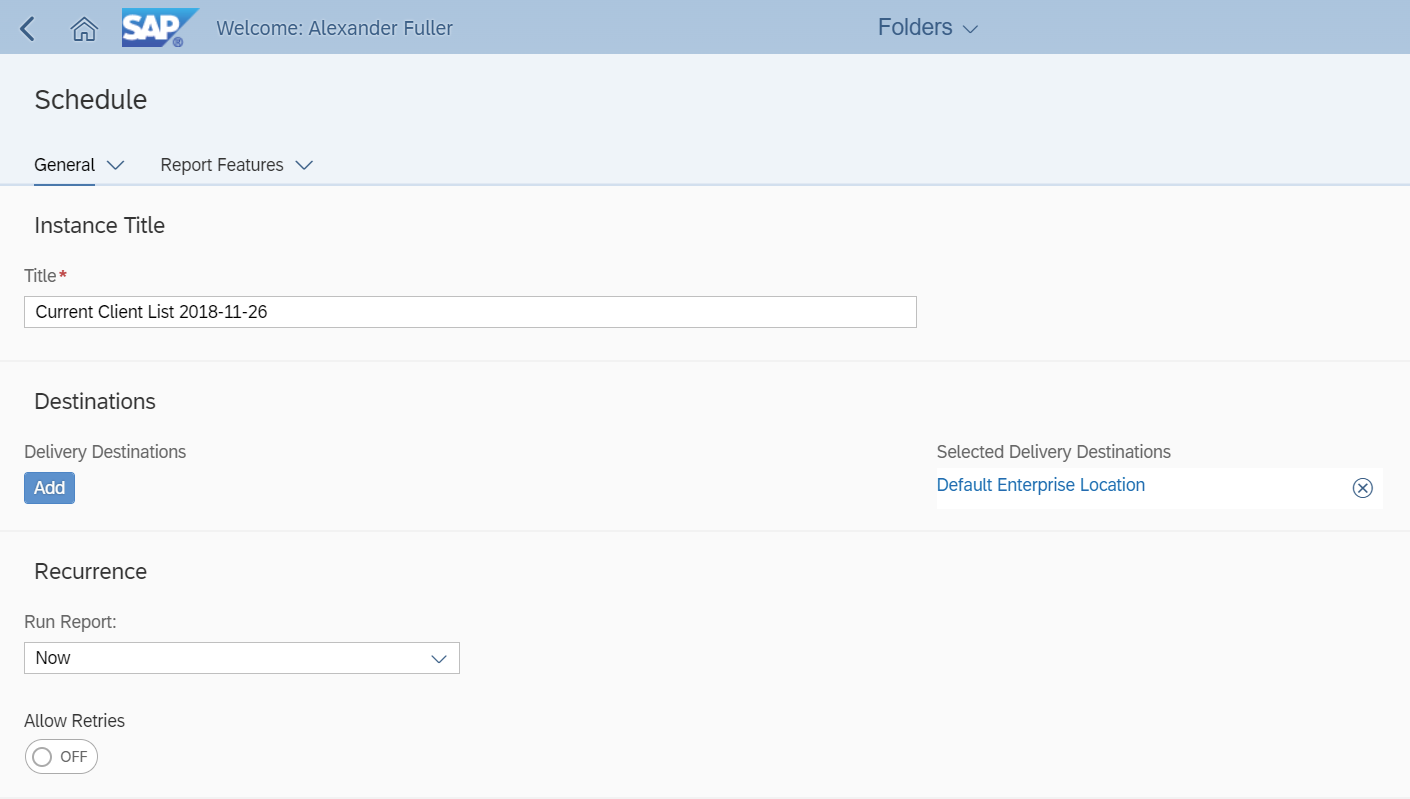
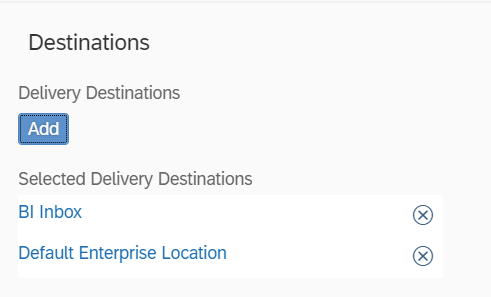
The Destination for the report should include BI Inbox and Default Enterprise Location. This will allow the report to be delivered to your Inbox.
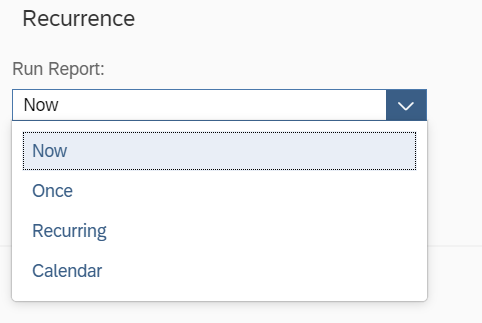
Recurrence will set how often the report will be generated.
Toggling Allow Retries = ON will allow the scheduled report to retry if it fails initially.
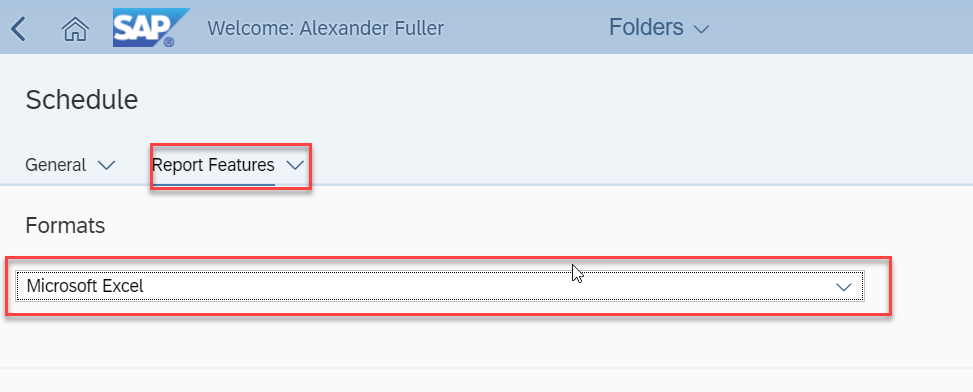
The next tab Report Features will allow you to set how the report will be formated. We recommend changing this to Microsoft Excel.
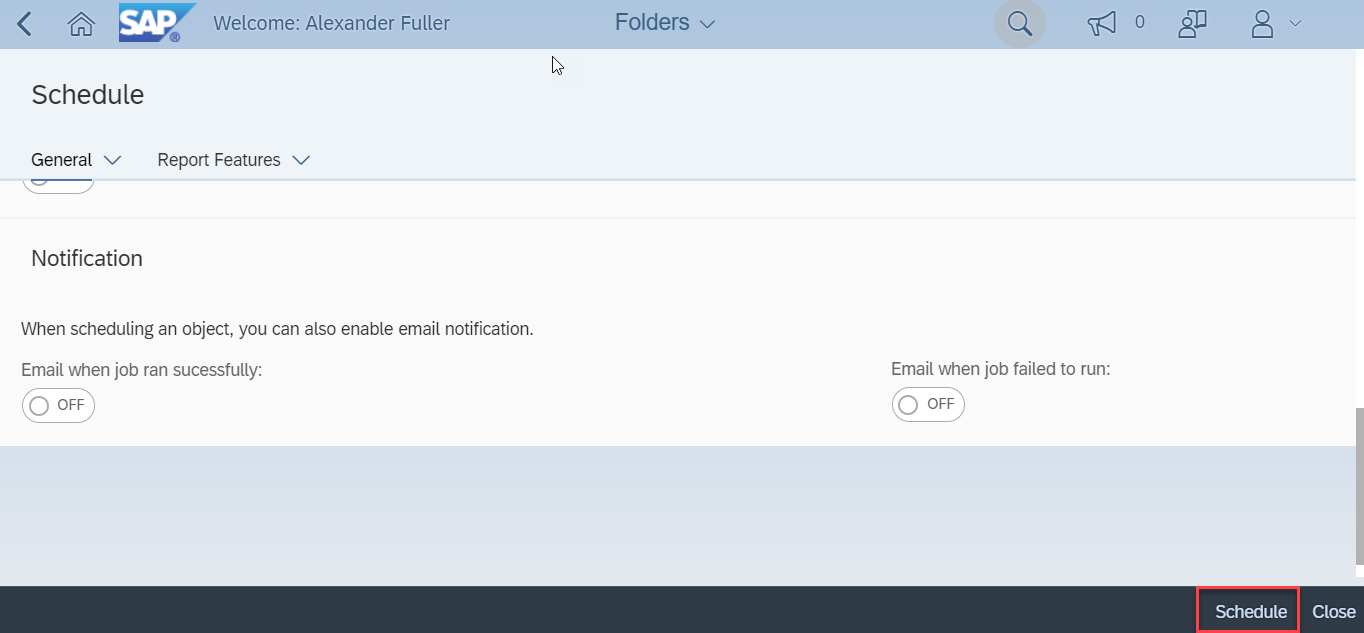
Once completed, Click Schedule at the bottom of the page.
Generated reports will be delivered to the BI Inbox that is located on the BI Launch Pad.

If you have any questions or need additional assistance, please email the Help Desk at helpdesk@allchicago.org or submit a web ticket here.