-
ShelterPoint is a module of ServicePoint that is used to track clients that occupy beds in a particular program. ShelterPoint uses Unit Lists, also referred to as Bed Lists, to track client bed assignments. In Chicago, ShelterPoint is being used to document how many beds a program has in their program, as well as how many beds are currently occupied and unoccupied. A primary function of ShelterPoint is assigning clients to beds. When clients are assigned to beds, a Shelter Stay record is attached to the client’s record. Shelter Stays are recorded as Service Transactions.
Despite the name ShelterPoint, Chicago will use this module of ServicePoint for all programs that house clients. Assigning clients to beds will be a necessary component of Coordinated Entry. Bed assignments will determine how many beds are unoccupied, allowing the system to accurately reflect programs able to receive referrals to fill those beds.
ShelterPoint is a menu option from the ServicePoint Menu, located on the left side of the screen.
Click on ShelterPoint to review the available Dashboard options.

Once a Provider and Unit List are selected, click Submit.

(* required)
Provider: Select a PROGRAM name from the available options in the drop-down list, select the program that data will be reviewed or created under.
Unit List: Select the Unit List that data will be reviewed or created under. If there is only one Unit List set-up for the Provider selected, the Unit List will populate automatically.
Check Client In – assign Households, including single clients and families, to beds – one at a time
Express Check In – randomly assign Households with single clients only to beds – NOT for families
View All – a list of all beds available under the selected Unit List – all dashboard options are available as well

ASSIGNING HOUSEHOLDS TO BEDS (SINGLES VS. FAMLIES)

This option takes the user to a list of ALL BEDS attached to the selected Unit List, including those that are assigned to a client and those that are empty. Clients are added to beds one at a time using this option and specific HMIS beds can be selected, representing the bed assigned to the client by the program.
Households including Families – start from an individual bed assignment for the Head of Household (HoH). There will be an option to assign each family member to a bed while assigning the HoH a unit from the unit list.
After selecting Check Client In, users will see the Shelter Inventory Information. All beds in the selected Unit List will be visible. There may be separations by Floor or Room.
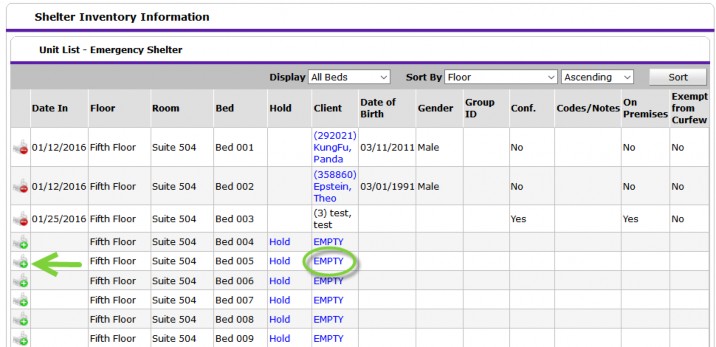
In order to add a single client (or a family) to a bed, click on the green circle with the plus sign, or the word EMPTY.

The Client Search window will appear next.
Users will search for clients by Name, Social Security Number (SSN) or Client ID number.
If Name or SSN are used, select the client’s record from the search results.

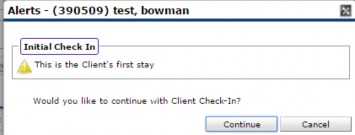
It’s possible that an Alert or Unread Client Note Notification window will pop up when you select a client record. Clicking Continue on the Alert window or Exit on the Unread Client Note Notification will allow the client to be attached to a bed.

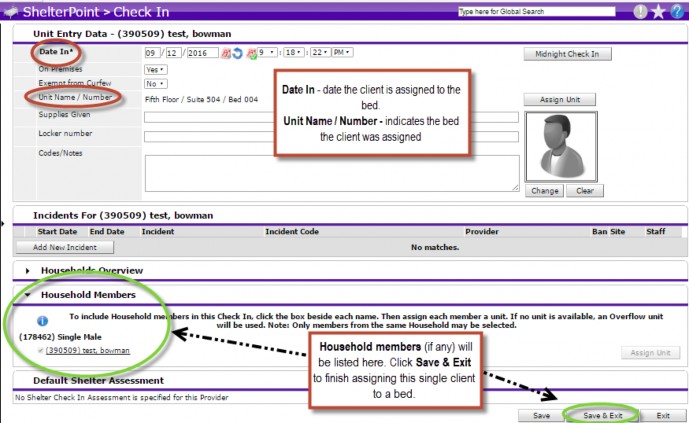
In the next screen, confirm the Date and review any Household members. Then click Save & Exit to complete the bed assignment.
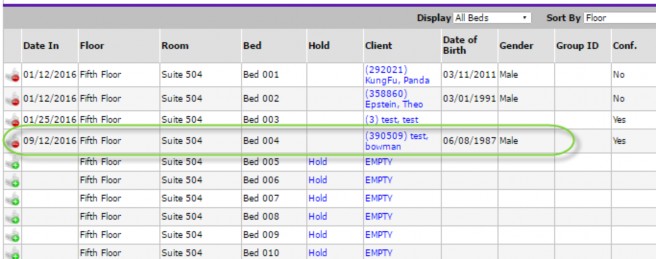
The user will then be returned to the Unit List. The client is now assigned to a bed.
ASSIGNING HOH’S FAMILY MEMBERS TO BEDS

In the next window, select a bed from the dropdown menu for the Household member.
NOTE: Once the bed is selected, the bed number will appear. Complete this step for each Household member staying in a bed.
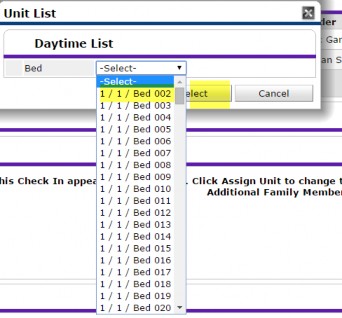


Click to complete the bed assignment for this Household.
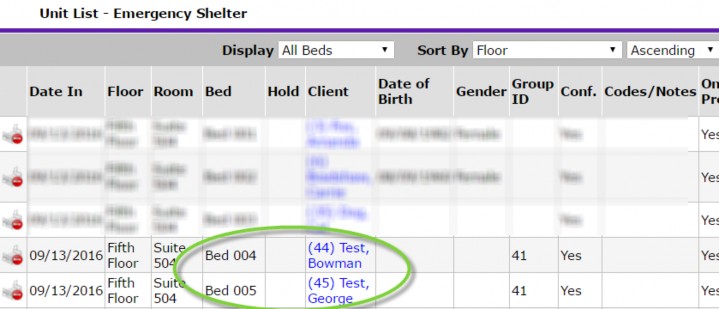
All of the household members should now be assigned to beds.

This options can be used for households representing SINGLE CLIENTS ONLY. Individual clients will be assigned RANDOMLY to the next available bed in the Unit List. Express Check In is a fast option to assign multiple clients to beds. User will search for clients by name, SSN or the Client ID can be used.
NOTE: it may be helpful to generate a list of client ID numbers to be assigned to beds, before using Express Check In.
Before starting your client search, ensure that your ‘Date In’ is set to the correct date. It will populate to “right now”.
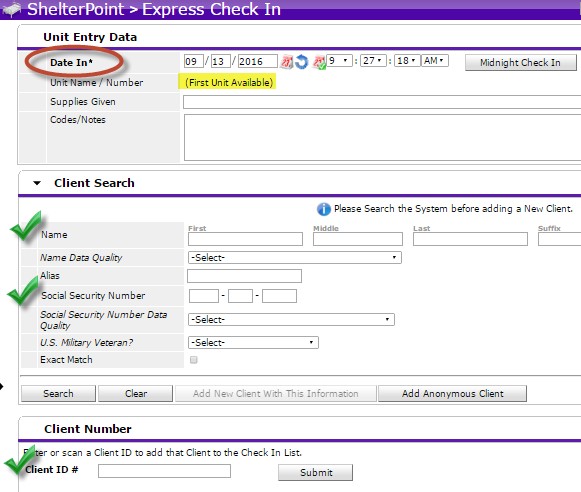
Find your clients by:
-
Entering the HMIS ID #
-
Searching by NAME or SSN
-
Scan client ID card
-
|
When using Client ID Number, click Submit to add the client to a bed.
|
|
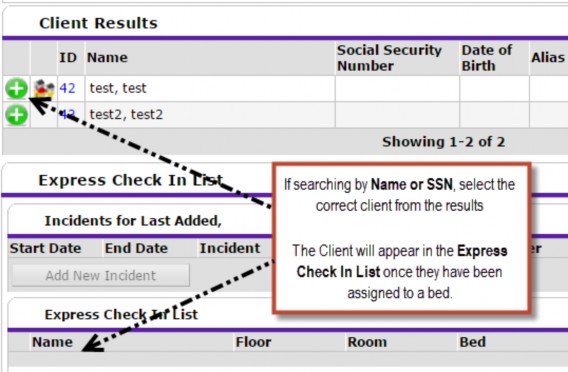
Alerts or Unread Client Note Notification windows could pop up when you select a client record. Clicking Continue or Exit will allow the client to be attached to a bed.
Once the client appears under the Express Check In List a Bed number will appear.

Move on to the next client that will be assigned to a bed. Users can add as many single clients to beds as needed, from this step.
NOTE: As each new client is assigned to a bed, the last client’s name will disappear from the list. As long as a Bed Number appears, the client has been successfully assigned to a bed.
CHECK HOUSEHOLDS OUT OF BEDS (ONE-BY-ONE)
Households are checked out of beds from the Unit List window. If you are not already in this window, select VIEW ALL from the ShelterPoint Dashboard.

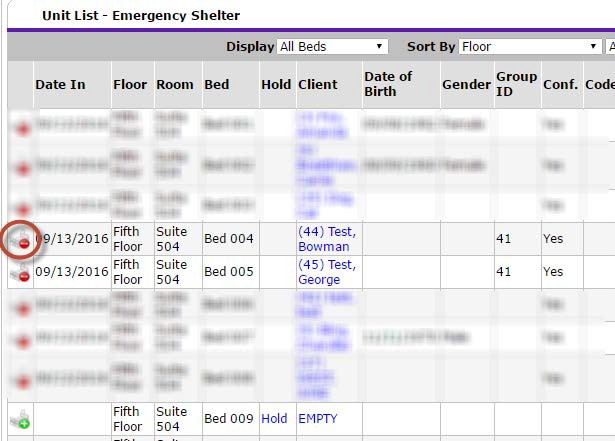 |
Find the client or HoH that will be removed from a bed. If there are family members, they will also be removed from beds in the next step.
From the Check Out window, ensure that the Date Out is correct.
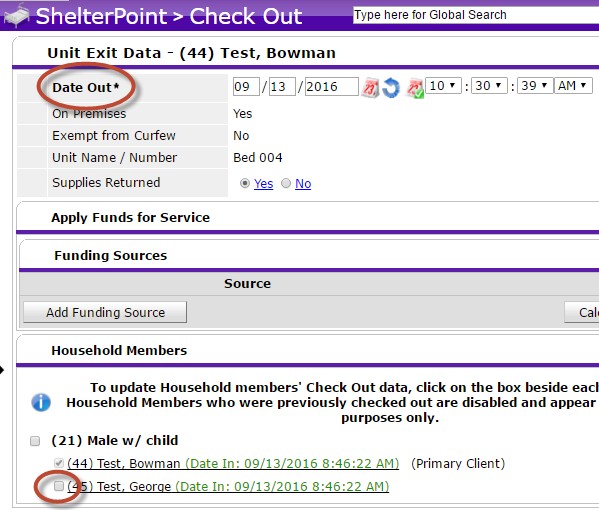
To exit family members at the same time as the HoH, check off the box next to all clients in the family who are checking out of a bed.
To complete the Check Out, select Save & Exit.

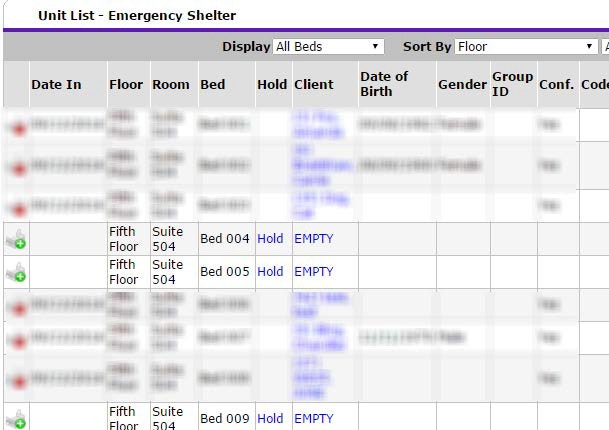
The user will now be returned to the Unit List view.
The beds that the clients were just check out of will now be EMPTY.
CHECK MULTIPLE HOUSEHOLDS OUT OF BEDS
Two Step Process: begin from the ShelterPoint Dashboard OR scroll to the bottom of the View All (Unit List) window.
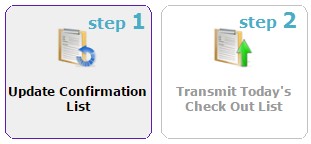
Step #1 - Select Update Confirmation List to indicate the clients that will be removed from beds. Confirm who will be staying in a bed for another night.
Setp #2 – Select Transmit Today’s Check Out List to remove the identified clients from beds in one step.

Update Confirmation List
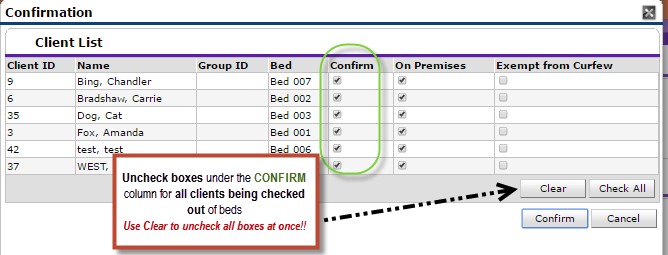
If the box is checked in the CONFIRM column, that client will not be checked out of a bed in Step #2. If any clients are remaining in beds for another night, keep their box checked under CONFIRM.
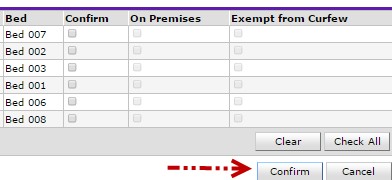 Click Confirm to move on to Step #2.

Now move on to Step #2.
Step #2: Transmit Today’s Check Out List
 or
or 
Check boxes under CHECK OUT for all clients leaving beds.
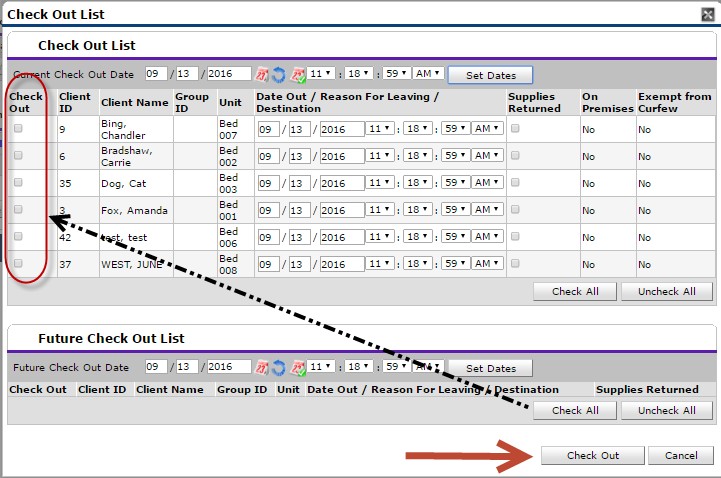
Dates of check out can be adjusted for all clients at the top of the window, or individually from the window listing each client’s Date Out.
Select Check Out to complete Step #2.
Returning to the View All screen will confirm that all beds are now EMPTY.
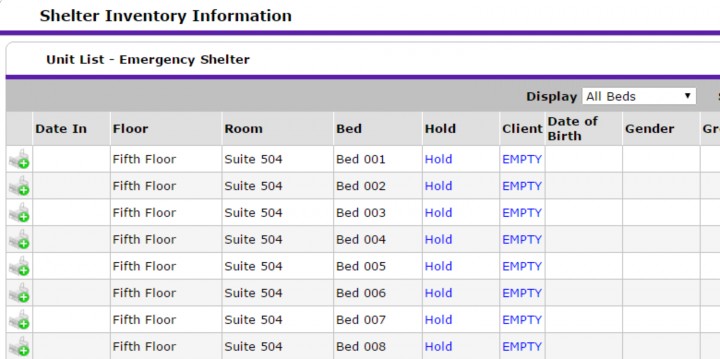
Unit Lists are maintained for each program by the HMIS Team, as requested by the Agency’s Technical Administrator (ATA). There should be an equal number of beds available in ShelterPoint, as are available in the program. There can be multiple Unit Lists created to represent different groups of clients, as requested by the program.
Floor, Room and Bed numbers can be randomly assigned by the HMIS Team, or the program can elect to create a list that represents their own numbering system. For scattered site projects, different Rooms can be set-up to represent family units.
Unit Lists can be adjusted, by reaching out to the HMIS Team. A link is available on the HMIS Helpdesk to request a new Unit List be created, to update an existing Unit List, or to delete an existing Unit List. Click Here to access the form now.
Shelter Stays are created under each client’s ClientPoint record when they are added to a bed in ShelterPoint. There is a Start and End date associated with the Shelter Stay record, as well as a Need. Start Dates represent the date the client was checked into the bed and the End Date is when the client was checked out. These records are used to run reports on how many clients occupied beds in a program, on a particular night. All users are able to run reports on Shelter Stays.
As questions arise, reach out to the HMIS Helpdesk by emailing helpdesk@allchicago.org
